Showing posts with label cake. Show all posts

Wednesday, October 3, 2012

31 Days of Halloween 2012 ~ Day 3

Pin It

It's great when things are crazy cute AND easy! This cupcake is just that. Use those adorable paper straws and add construction paper feet and you've got instantly adorable witch cupcakes! Click on the picture for more great ideas from Better Homes & Gardens.


For more 31 Days of Halloween...

Saturday, May 5, 2012

Cinco de Scrapo
FREE Mickey Mouse Cupcake Toppers

Pin It


Did you know there was such a thing as National Scrapbook Day?? I didn't. But there is and it's today!

Now, I don't scrapbook. I've admitted as much. But I love some me digital scrapbooking paper and embellishments to make printables, cards and cupcake toppers - like the Mickey Mouse ones above. I made those using the My Memories Digital Scrapbooking Software. It comes pre-loaded with lots of different paper designs and embellishments and that's what I used to make these. It is so easy I often opt to use the MMS software instead of photoshop, especially for stuff like this.

And in honor of National Scrapbooking Day I'm sharing these FREE Mickey Mouse 2" cupcake toppers with you. Just click the picture above to download. Of course, you might prefer to get the My Memories Digital Scrapbooking Software and make your own personanlized versions. Now would be the perfect time!

The folks over at My Memories are doing up National Scrapbooking Day in a big way with their Cinco de Scrapo. All 35 of their designers are giving away a freebie that you can use with your MMS software to create your own personalized scrapbooking pages. Or, if you're like me, some really fun printables. You can hop on the Cinco de Scrapo blog train, here, on the My Memories Blog. They will also be having some fun giveaways, prizes and challenges on their Facebook page. These freebies and giveaways will only be happening this weekend, so don't miss it!

And if you decide you'd like your own My Memories Digital Scrapbooking Software to get creative with, you can download it, here. Be sure to copy and paste this code: STMMMS78265 for an extra $10 off! To make it even sweeter, the software is already 15% off - this weekend only!


Happy Cinco de Scrapo!

Monday, April 23, 2012

A Sweet Celebration - 1st Birthday Party

Pin It

My niece's first birthday was a sweet celebration indeed. With a candy theme and a baby with those cheeks, how could it not be!


My SIL and I had a blast DIYing this party, from the pom poms hanging from the ceiling to the amazing party hats that she created.


We made custom printables to adorn the delicious desserts that the party's theme was centered around.


And aren't these hats amazing? They were created using scrapbook paper, cardboard cutouts sprayed with Krylon's glitter spray paint and tissue paper.


And of course the birthday girl had her very own blinged out version!


She rocked it, no?


You might remember this highchair transformation that I blogged about here, 'A Truly High Chair'. It remains one of my most favorite things I've transformed.


The first time I ever did a photo booth was for my son's first birthday, 'A Carnival 1st Birthday', and I don't think our family could ever have a party without one now.


And by family, I mean the dogs, too.


I hope this has inspired you in some way for your next party. If so, please take a moment and leave me a comment. They are always greatly appreciated!

Happy Monday,

Wednesday, April 18, 2012

#Winning! Wednesday - Another Fun Freebie


Pin It

It's #Winning! Wednesday. Do you know what that means? It means I have a freebie to share with you. This one is courtesy of the folks at My Memories and I think this is one of the things that makes them so awesome - You don't even have to have the My Memories Digital Scrapbooking Software to use it! It's just free. Who even does that?!

BUT, if you did have the My Memories Digital Scrapbooking Software you could make your own and much, much more. See I told you guys this wasn't just scrapbooking software. And each free download below contains not only the ready to print and assemble bag but also all of the papers and elements that went into making these printable gift bags. The printable creations that can be made from these pieces are limitless!! So, if you're ready to take the plunge (and I mean for less than $30 bucks, why not?) you can do so by clicking the banner below. Be sure to use the code: STMMMS78265 for $10 off.


Use Code: STMMMS78265


The Mad Hatter's Hat Cake I made for the birthday girl


Ok! On to the free stuff!

Since I hosted my giveaway by introducing you all the awesome invitation making abilities (See Post Here) of the My Memories Digital Scrapbooking Software, I thought what better way to use this freebie than to create a gift bag for the birthday girl. I think it was the perfect way to package a gift for a Mad Tea Party and I love how it turned out!

Soooo do you want your own? Here ya go! Just click on the pic to download the bag of your choice - or download them both!

Just click, download, save, print, then assemble!


Just click, download, save, print, then assemble!


If you enjoyed these freebies leave me a comment letting me know and be sure to join me each #Winning! Wednesday for more. For even more freebies, like My Memories on Facebook for their Friday Freebies.

Hurry! Each freebie is only available for a limited time!

Thursday, November 3, 2011

Carnival 1st Birthday Party


My baby just turned a year old in September. I can hardly believe it. I feel like I just had him. And since I'm still carrying around the baby weight, I sorta wish that were true.


We had the greatest vintage circus/carnival birthday for him and I've been anxious to share it with you. And since this is part of the Thankful series on my blog I'd just like to take a moment to say thank you to my husband for never, ever complaining about all my grand ideas and always playing along. You make it so much more fun to be me!

You saw our Big Top tent how-to, here, but believe me when I tell you there were far more spray painted, glued and decorated shenanigans going on.


I'm a big believer in using what I've already go to get just what I want and most of the time it's totally do-able. And if not, a trip to the dollar store is usually all it takes.

Dollar Store Glass candle sticks, ice cream dishes & faux silver platters.
A little glue + some spray paint = awesome serving trays


Costumes were necessary to complete the theme and let's face it, I'll use any excuse to wear a costume. I made the birthday boy's outfit and just put some stuff we had on hand together for Daddy - Edgar the Great (magician) and myself - a vintage clown. But big brother got a store bought one because I couldn't figure out how to do Strong Man DIY style. BUT I did make Strong Man a barbell with some styrofoam balls, a dowel and some spray paint. Can I just say, styrofoam balls are expensive!


And my final project, aside from the food, was a special seat for the birthday boy. I had my heart set on a wooden highchair, legs cut off with just the seat perched atop two round, galvanized containers in graduated sizes painted to look like old elephant stands. I mean, that's not asking too much, is it?


Now you have some idea what being me is like and how wonderful the people are who put up with me. In the end, I wound up with a special chair for the birthday boy - a donation from a friend who's two boys are all grown up - in other words, FREE! Add a little spray paint and while it wasn't what I'd envisioned, it was perfect.

And so.....it was time to party!


Mmmmm Cake! Popcorn cupcake recipe found, here.


I used liquid eyeliner on the baby's face. It stays put but it's gentle.
Find the cheapest Strong Man costume on the web, here.


The highchair turned out perfectly even though it wasn't what I envisioned. I spray painted the whole thing white then used my Silhouette to cut a mask for the tray, then spray painted that red. Aren't baby feet the cutest??


The baby's outfit was just a simple onesie that I added ric rac to for faux suspenders, a bow tie made from the same sheets I used for the photobooth (below). The 1 was created from felt I hand-cut then used fusible web to add a hand-cut 1 from the sheet material on top. After that I ironed the whole thing on to the onesie with the fusible web.


Plenty of clown noses, party horns & jumbo glasses were on hand as well as tons of popcorn. After all, you can't have a circus without popcorn!


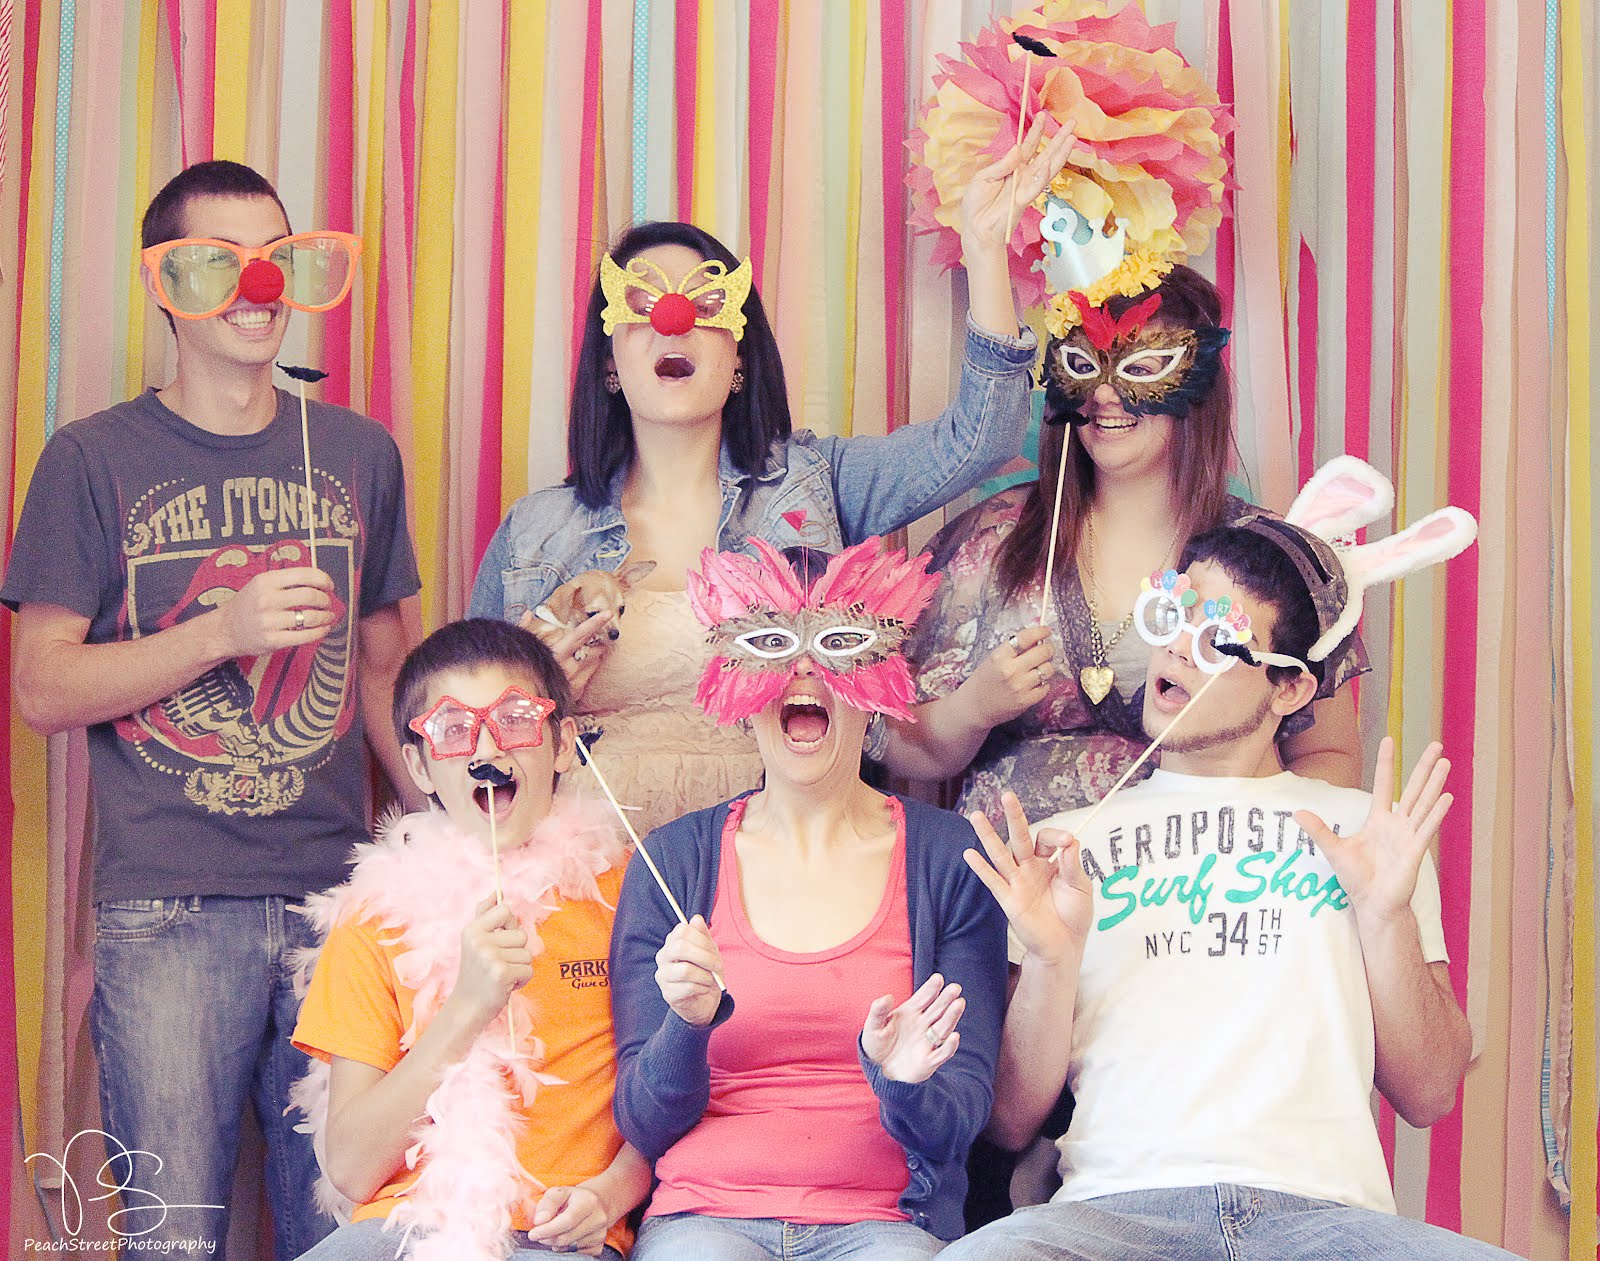
I've gotta say, one of my all time favorite things about this party was the photo booth. Made from simple things like bulletin board paper and striped sheets from Walmart, it was a huge hit. I set up a prop station of clown noses, jumbo glasses and chenille mustaches and everyone had a great time getting into character. I can honestly say I didn't hear one person complain about having his or her picture taken. Even me. And that's sayin something!


Linking up.....

Friday, August 26, 2011

Star Wars Birthday Party

I really didn't intend to take so long to post this. Hopefully you're still interested. Maybe.


When I posted pictures of that epic failure of a cake last week my husband saw it on my blog and said it looked like a giant marshmallow. Hmmm. Instead of trying to turn it into Jabba the Hut (which I thought about) or tossing it into the pond (which I did) I should have just sprayed some yellow and brown food coloring on that bad boy, pretended it was always supposed to be an awesome roasted marshmallow cake and called it a day.


Luckily tragedy was avoided by creating a cake of epic proportions capable of distracting from questions like, 'what happened to that r2d2 cake you were going to make?'.


I found the greatest (and easiest) recipe for a chocolate cake. Ever. Which you can find right here. It's moist, super chocolately and absolutely ridiculous which I believe is inarguably the way to go with birthday cake. Plus, you need simple ingredients - everything is pictured above - and no one will know you used a mix. Trust me. And try not to eat the batter. It will be hard. Just keep telling yourself there are raw eggs in there. Maybe that'll work for you.


I also learned a really neat trick while baking this cake. I was using a 10" round, 3" deep cake pan which "requires" a heating core. I hate those things. Don't you? Anyway, I didn't want to use one. Partly because I'm stubborn and partly because I didn't want a gigantic hole in the center of my cake. I needed to put a larger dowel in the center of the cake to attach r2's head to, well I didn't actually get that far, but keep in mind this is all happening while I'm still delusional enough to think I can pull off this amazing cake. Anyway, the large hole down the center paired with that dowel down the center would've been a bit like toilet paper rolling around on a toilet paper holder. And no comments on how it actually turned out looking like a large roll of toilet paper either. I'm trying to tell you about a trick I learned.

Anyway, it turns out, all you have to do is insert one of those rose nails (the metal ones) in the bottom of your pan. It conducts the heat without leaving a gapping hole. How about that! I played it safe and baked the cake per the mix directions referring to the bunt pan cooking times then lowered my temp to 325° and finished baking in 5 - 10 min incriments. Checking it each time.


Find cool pics of Star Wars images and make up clever names for Star Wars inspired drinks. Create in photoshop making about 8" to 8.5" wide but be careful not to extend your images all the way to the top or bottom unless you've left a small border around it because it will get slightly cut off during printing. I did two labels per page. Have them printed on 12 point paper - glossy card stock. I had mine printed at Office Max for around $5. Remove soda labels and apply your labels with a spray adhesive. Anything else and they will fall off. Not cool.

Make your own invites. Find high res (by searching Google images) Star Wars backgrounds and add text. It's that simple. Remember, when having it printed make sure to size it like 4.75 x 6.75 or something like that so that none of your coolness gets cut off during printing. Save it as a .pdf and take it to your printers. Again, I used the 12 point or glossy card stock. Don't know how to prep for printing? Save it as a .jpeg image and let the folks at your printer's do the rest.


Make your own Thank You notes. They're cuter and more personal. Create a blank document in photoshop (or similar program). I wanted a 4 x 6 note so my measurements were something like 3.75 x 5.75. If you change the largest number and keep a check in the constraint proportions box, it will automatically change both number and that's the safest way to go. I added my photo on top of another red square so it would have a nice border and added text. I put his name in the bottom corner but left some space on the left for him to write his friend's name. If your child is like mine and doesn't like to write more than he has to but you're like me and you're bound and determined that he will, this is a good compromise. I didn't make him write an entire note but I did want him to write something. This way we were both happy. These I just took down to Wal-Mart and printed them myself from the self-serve printer. They were ready in 8 mins and cost me about two bucks.


We rented a waterslide so naturally I thought they should also have some pool noodles to beat each other silly with.


I made some "lightsaber" pool noodles using Chrome duct tape, black duct tape and red duct tape. An easy trick to cut duct tape into shapes, especially circles, is to put it on wax paper (the shiny side) and then make the cut. BUT make sure you put the tape on the wax paper and immediately make the cut otherwise the tape will be permanently stuck to the paper which completely defeats the purpose.

I cut pool noodles in half so one noodle equals two lightsabers. I wrapped the bottoms of the noodles in Chrome, cut black strips for the handle and cut circles for the button.


I can't lie and say I'm not disappointed that some of the things (ok, the cake!) didn't turn out exactly as I planned but something tells me that he couldn't possible have cared any less. And that's the point, really, isn't it.


It was a good party. Vader agrees.


Here are some free printables for you. If you want to use them, click on the pic to open it up then download. If you'd like more info on how I used them see my previous post, Confessions of a Chronic DIYer.


Enjoy & May the Force Be With You,



Linking up ......

Join  us Saturdays at tatertotsandjello.com for the weekend wrap up party!
Related Posts Plugin for WordPress, Blogger...
I'm A Member of Art Dolls Only Gettin Creative Every Day Fan of kevinandamanda.com! Free Fonts. Recipes. Scrapbooking. Photography. Blog Design. Tutorials. Giveaway. Everything you're into! My Repurposed Life mmm button Roots And Wings Co U Create ec grab button BWS tips button BWS tips button frou-fruGal Ana White - making a home with handmade furniture and other DIY projects Craft DIY Ideas Show and Tell